Coffee Filter Butterflies
By Alison Stoner
One thing no one prepared me for for motherhood was how much of your child’s entertainment falls on you.
I will elaborate on that statement by mentioning two things: We have strict limits around screen time, and yes, I do just let my children soak in their boredom most of the time. My four kids have gotten fairly good at finding things to occupy their downtime, but there are definitely days where we are most successful with something more structured.
Finding games, projects, and activities for my kids to do has been a part of my daily itinerary for the last 11 years, and now that the kids are homeschooled, I’m finding it necessary to have planned out activities on-hand for our week. Pinterest has been my best friend for finding ideas, but I also like to dig back through my younger years (when screens weren't as enticing of a distraction) and what I used to do.
This winter we cut snowflakes from coffee filters and hung them from the ceiling in our hallway. I won’t lie, it was kind of magical. One March day, in my anger toward yet another snowfall happening outside, I finally took down the fluttering flakes in the hallway. I was met with groans from my family so I obviously had to come up with something to replace the snowflakes!
Insert, the coffee filter butterflies!
These little butterflies were the perfect replacement to our winter wonderland we had created in December, but another pro is that very simple supplies were needed, most of which you probably already have at home too!
Coffee Filter Butterflies
Supply List
Coffee filters (2 per butterfly)
Washable markers
Spray bottle with water
Pipe cleaners
Fishing line or other string (if you want to hang them like we did)
Instructions
Tie-dyed coffee filters for butterflies!
Fan-fold two filters together
Secure with a pipecleaner
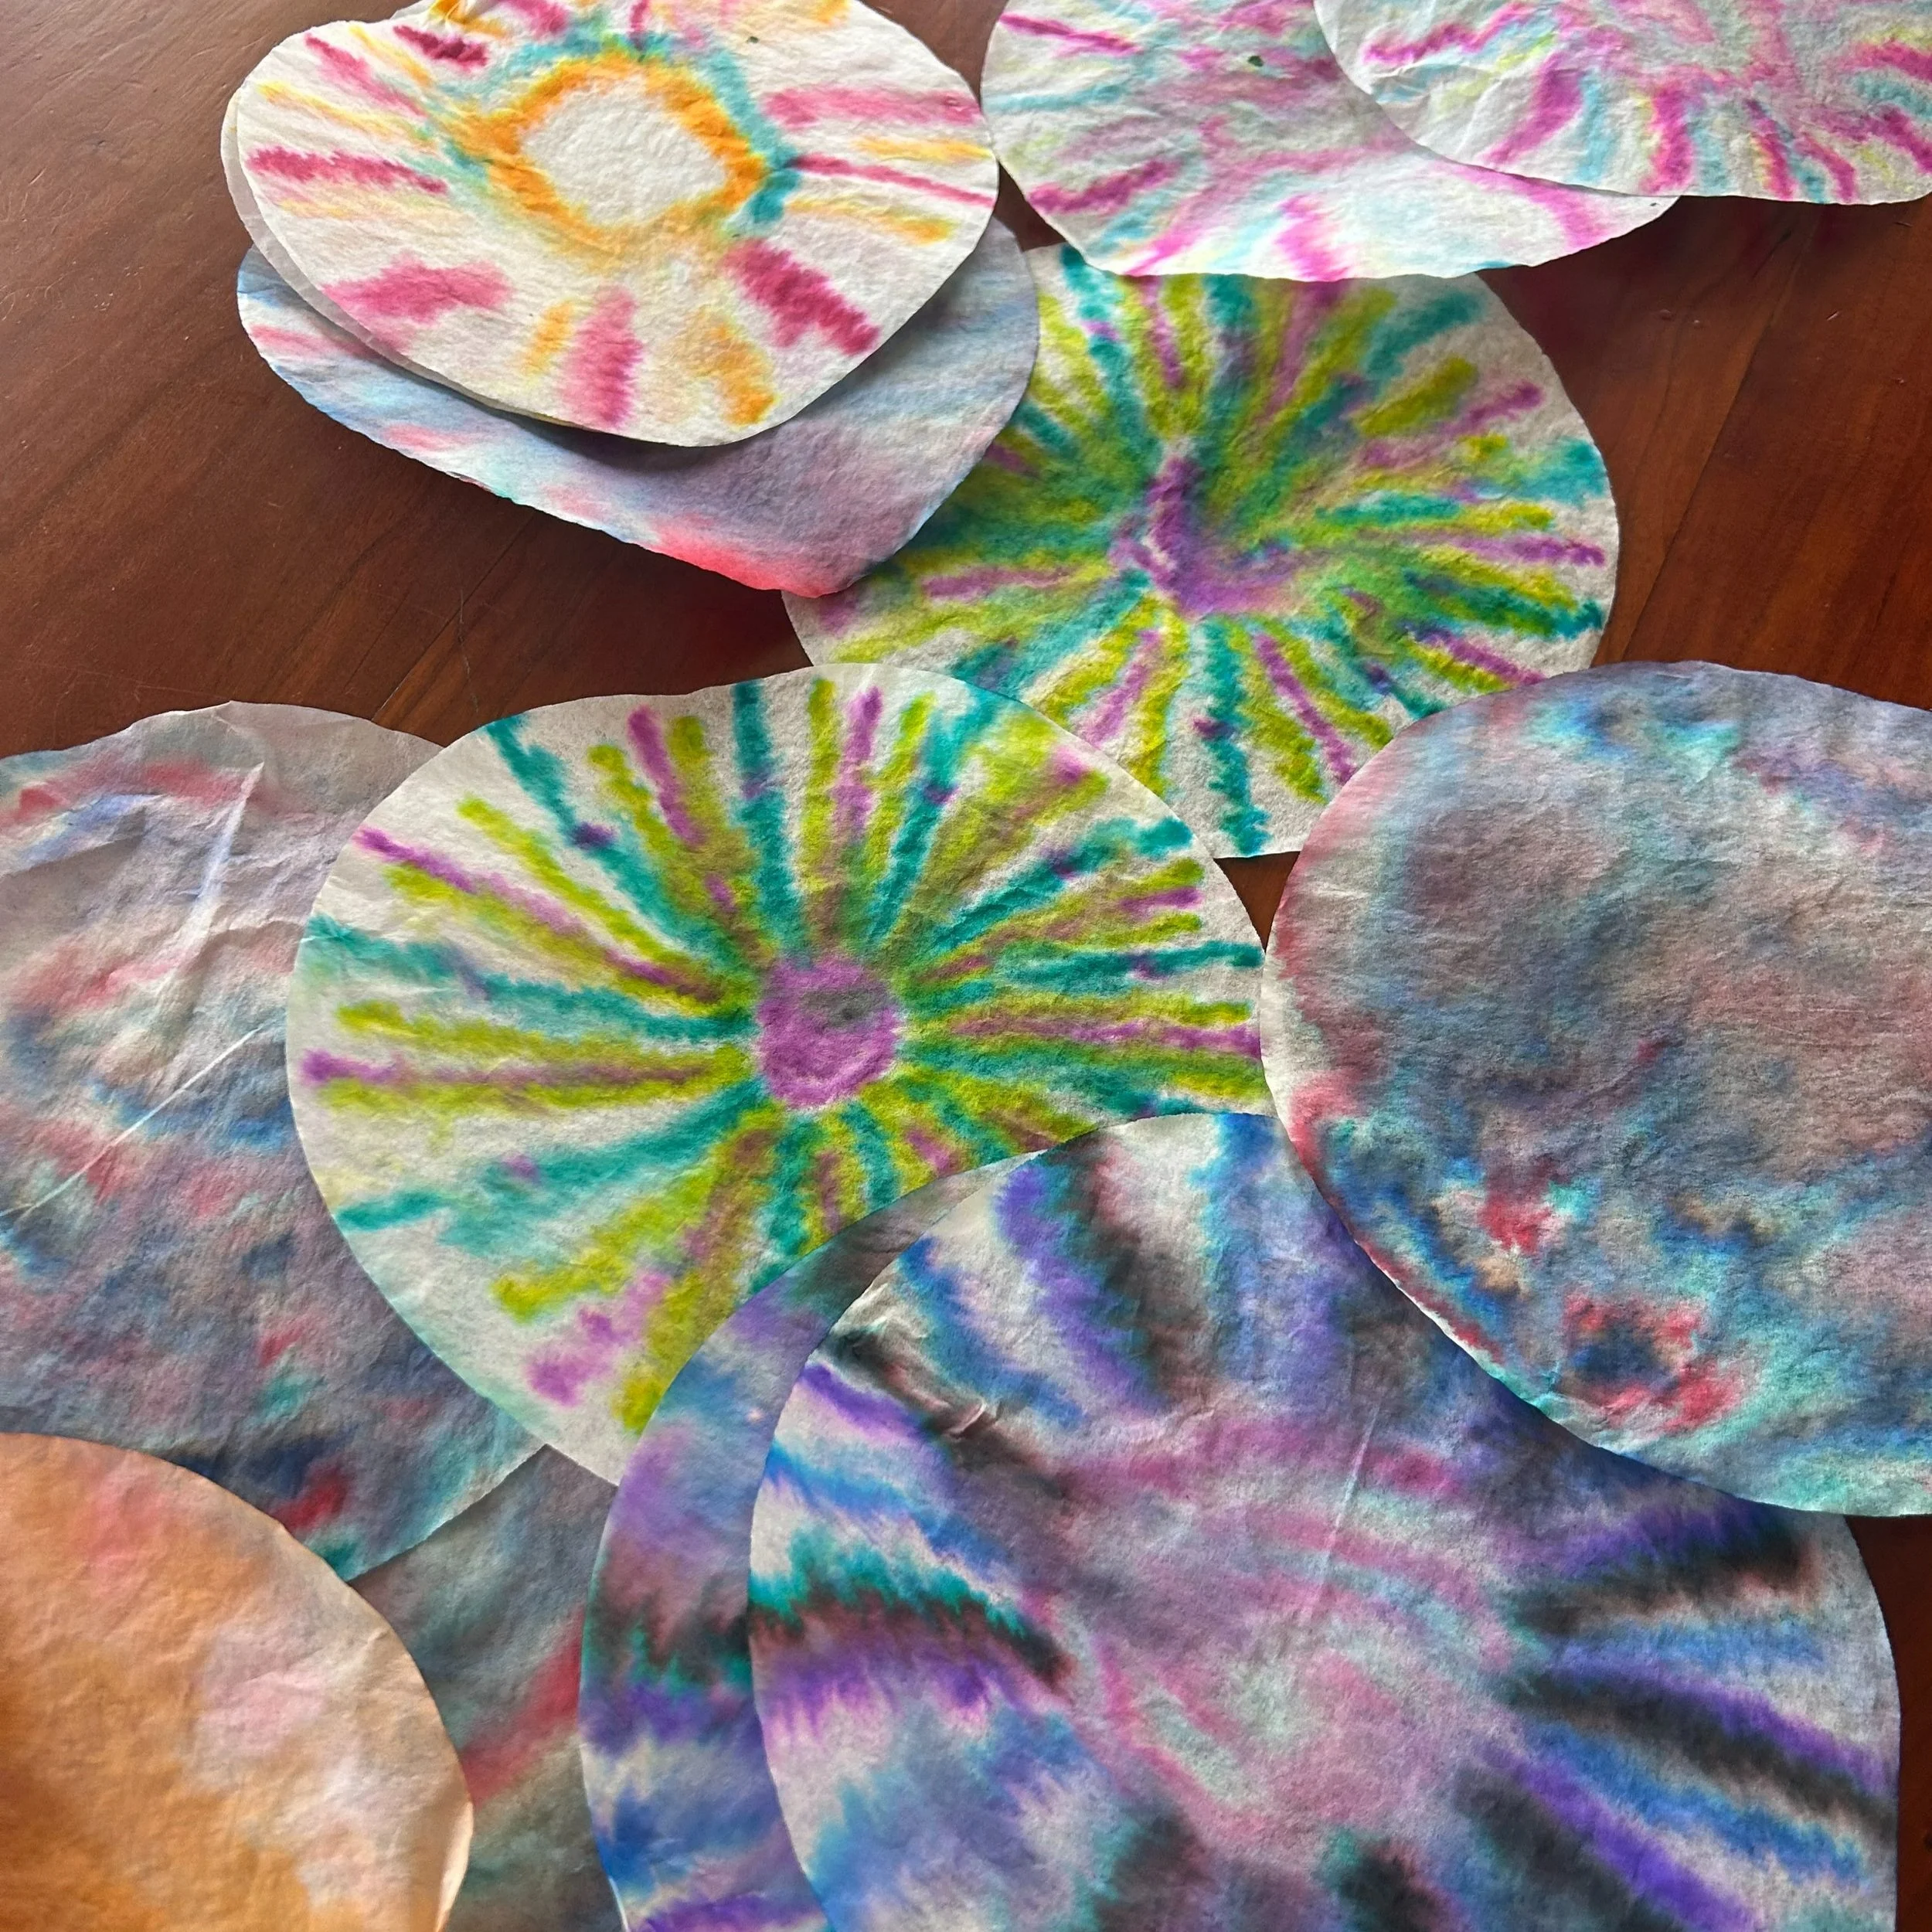
Flatten out your coffee filters the best you can. With your mashable marker, fill your coffee filter with colorful designs. We found it best to fill the filter and leave a limited amount of white space. (Reminder: You will need two coffee filters for each butterfly.)
Set your colorful coffee filters on a cookie sheet or other protective board (this is an important step because things are about to get a little messy). Mist your coffee filter with water from the spray bottle. You’ll want to ensure the filter is completely covered with water, but be careful not to soak it!
Watch as the colors blend together as the damped ink spreads. This was the most exciting part of the project for my kids!
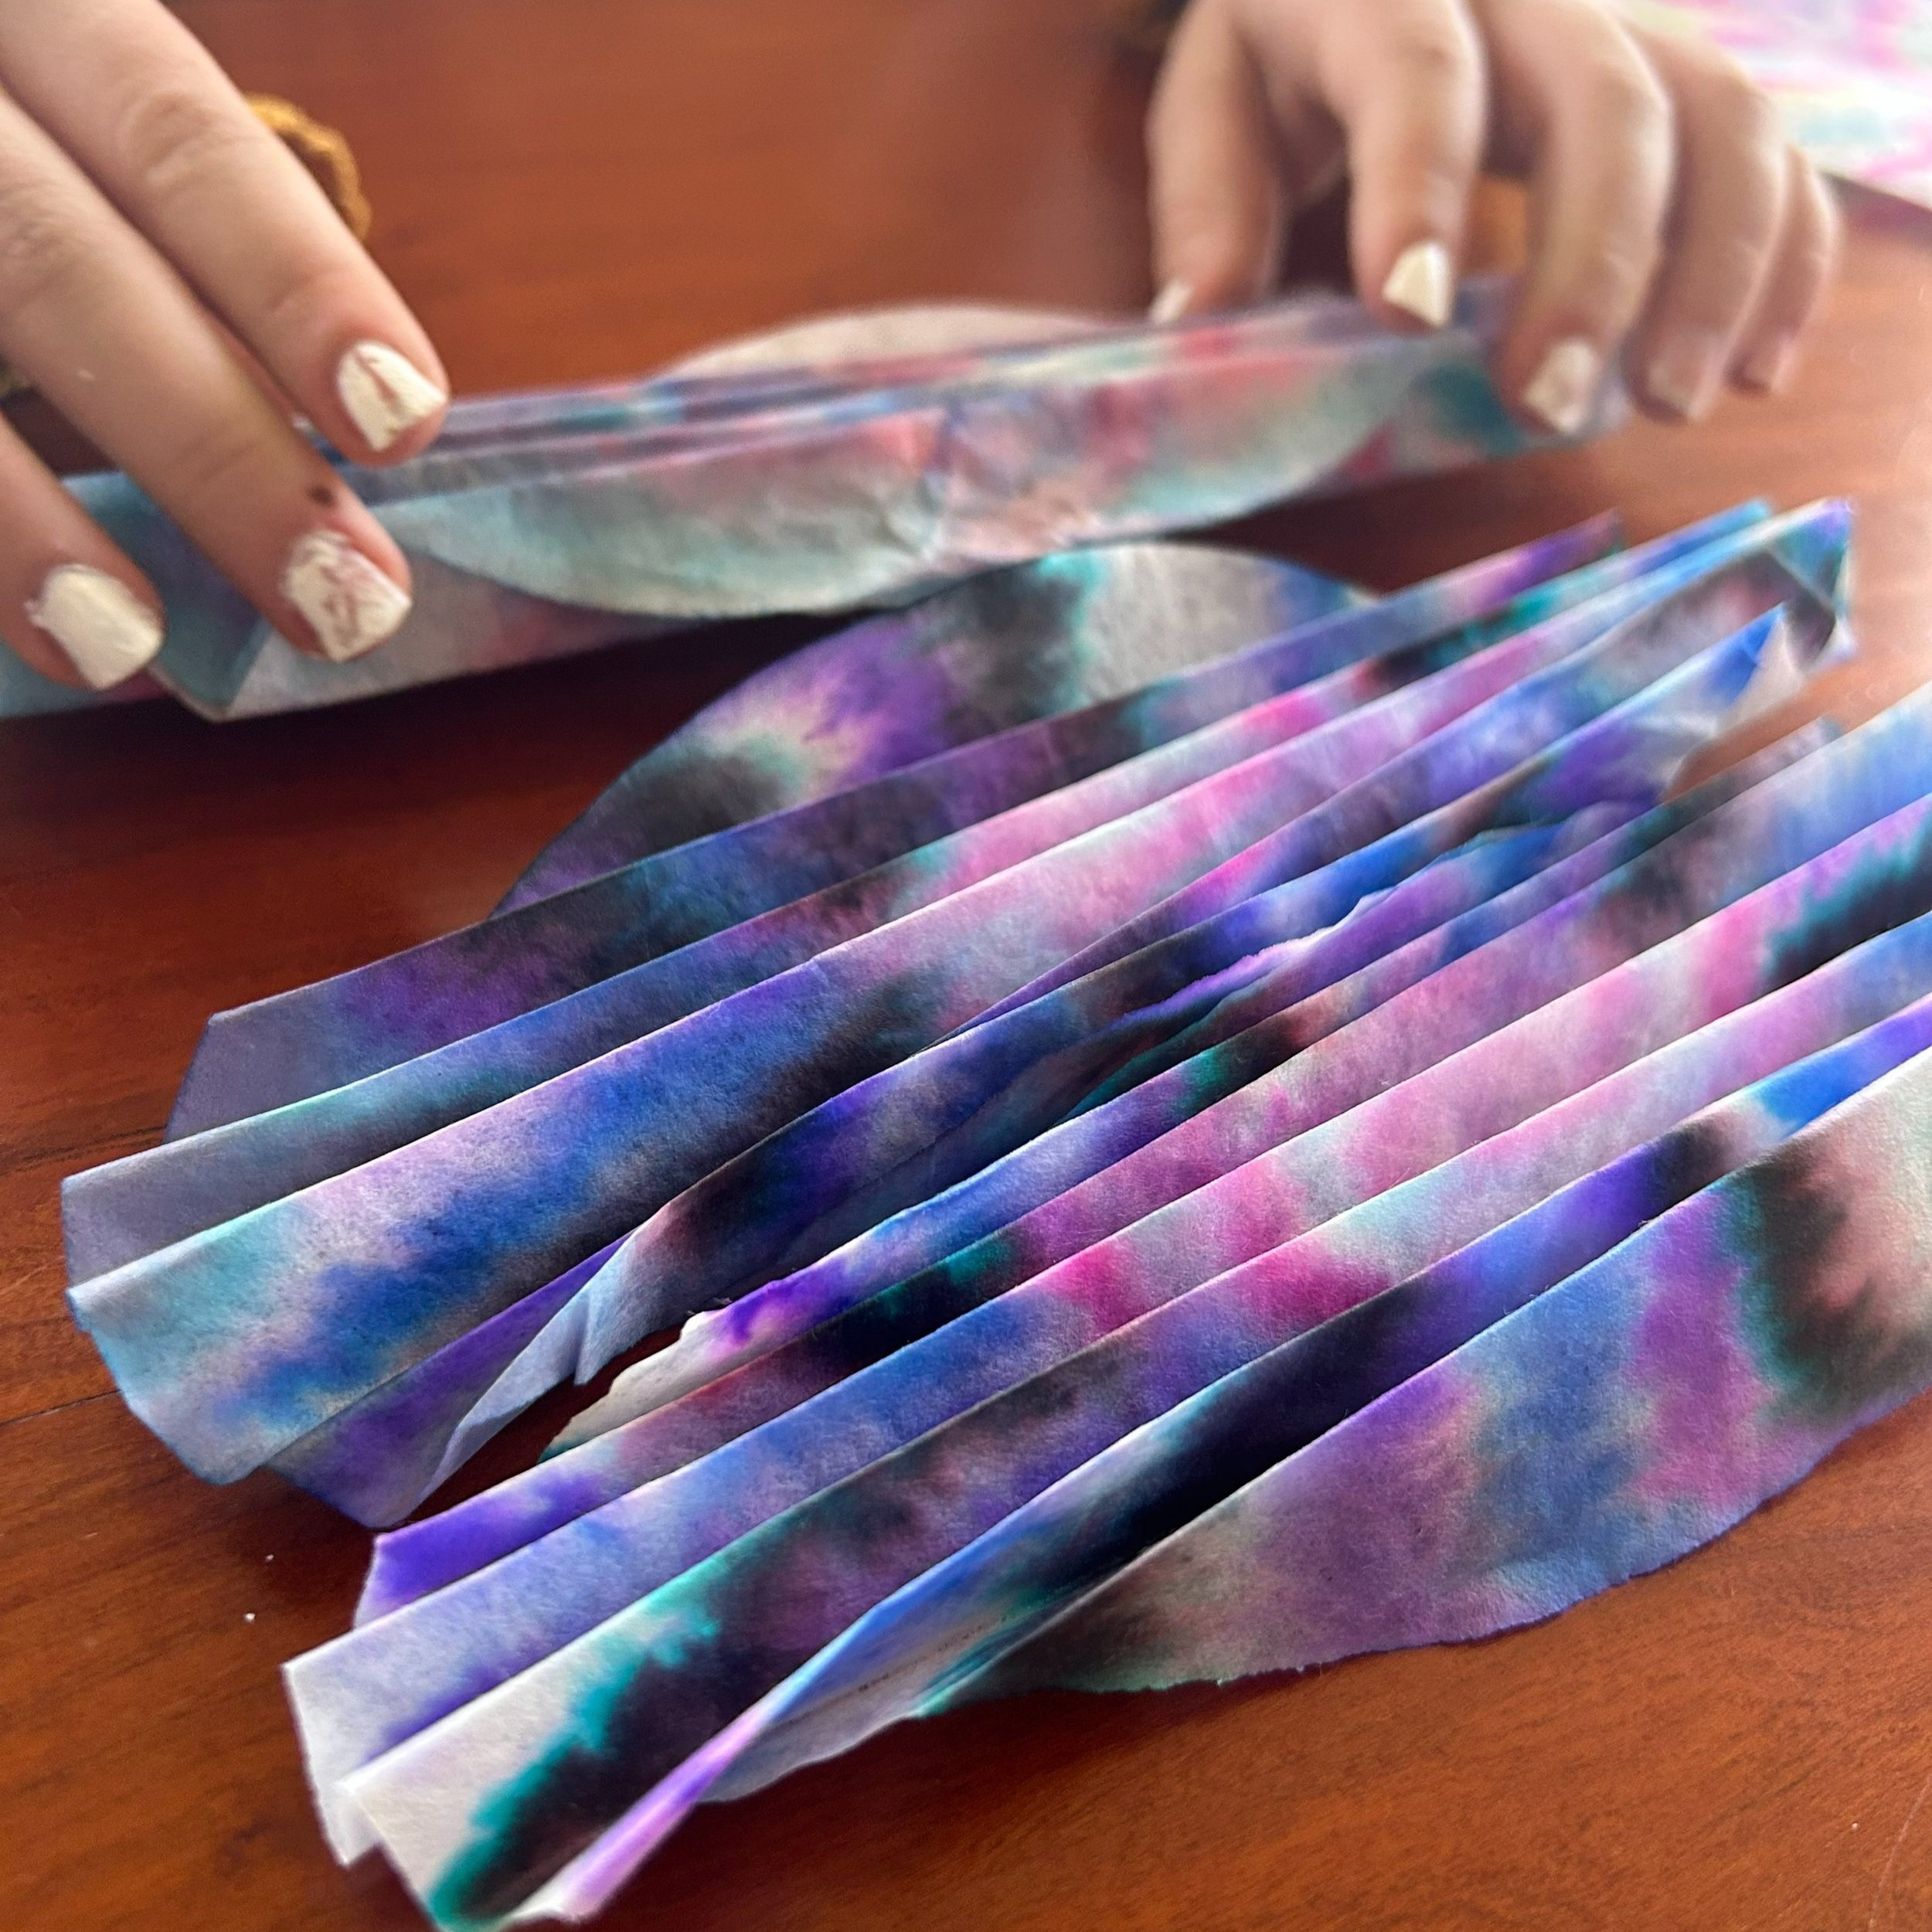
Let the filters dry fully. We found they dried the fastest by hanging them up with clothes pins. If it’s a nice day, you could probably do this whole project outside, eliminating the risk of ruining your dining room table and using the clothes line to help expedite the drying.
Once the filters are completely dry again, fan fold each one.
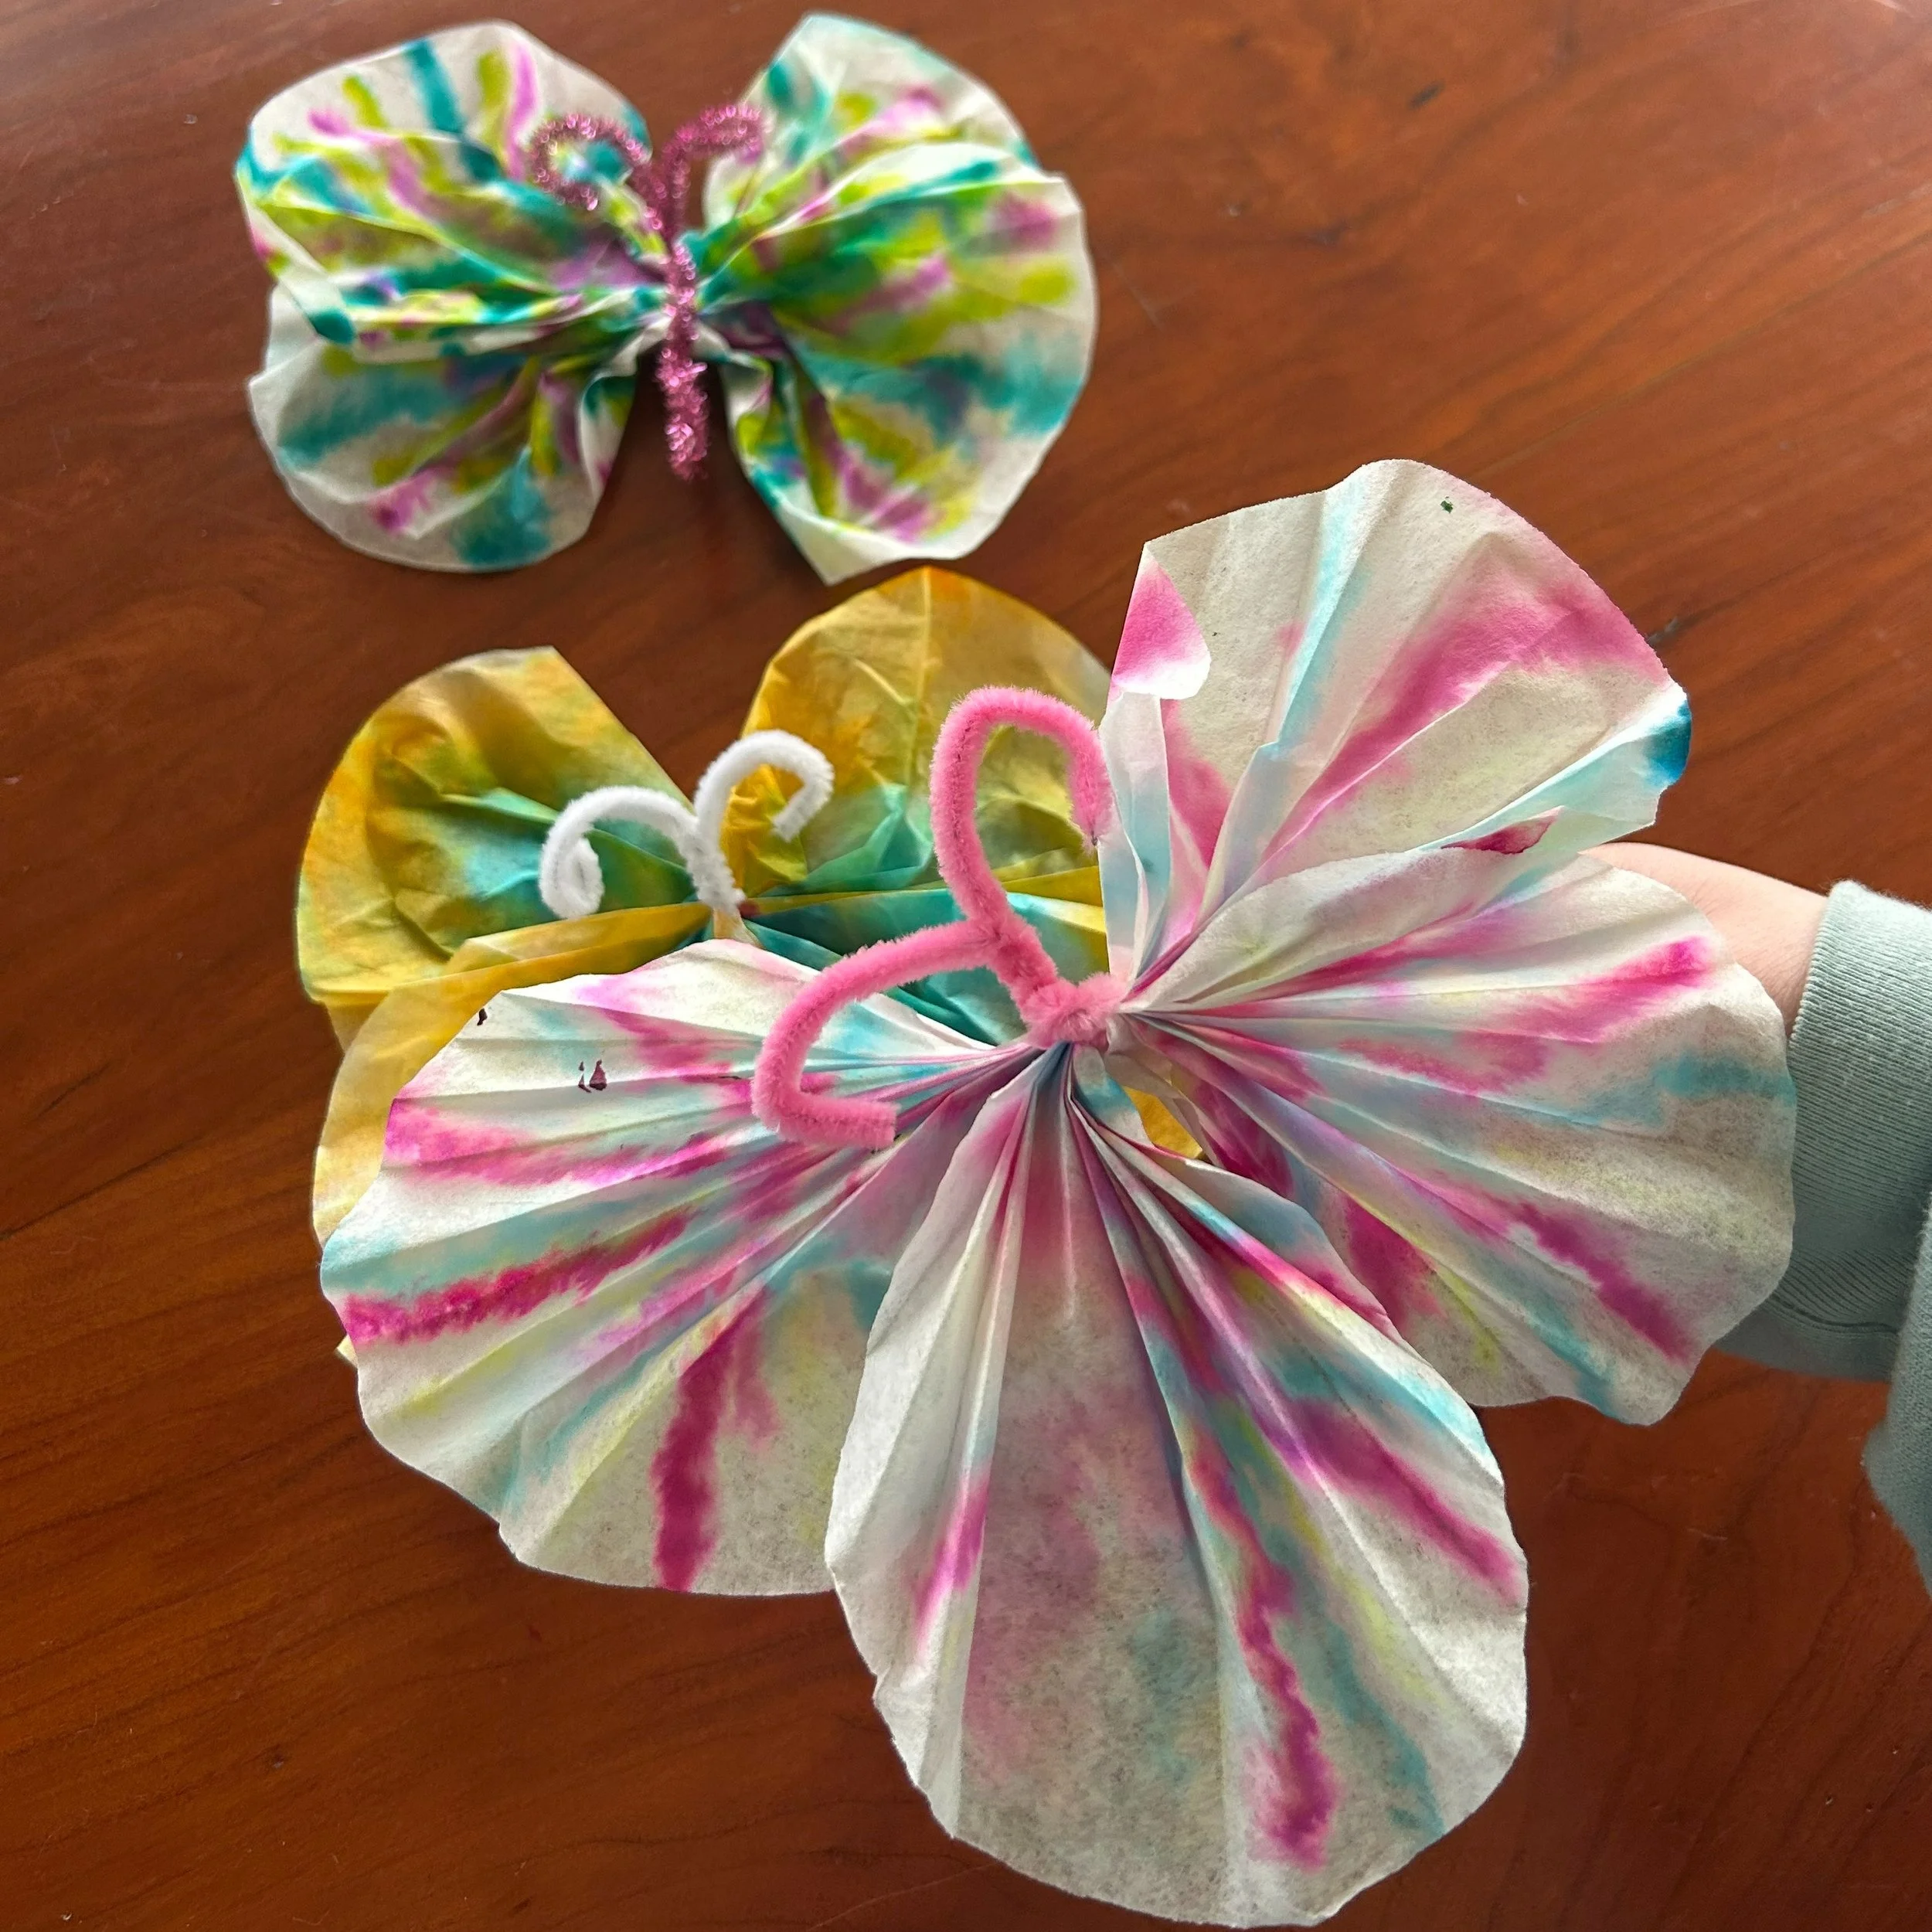
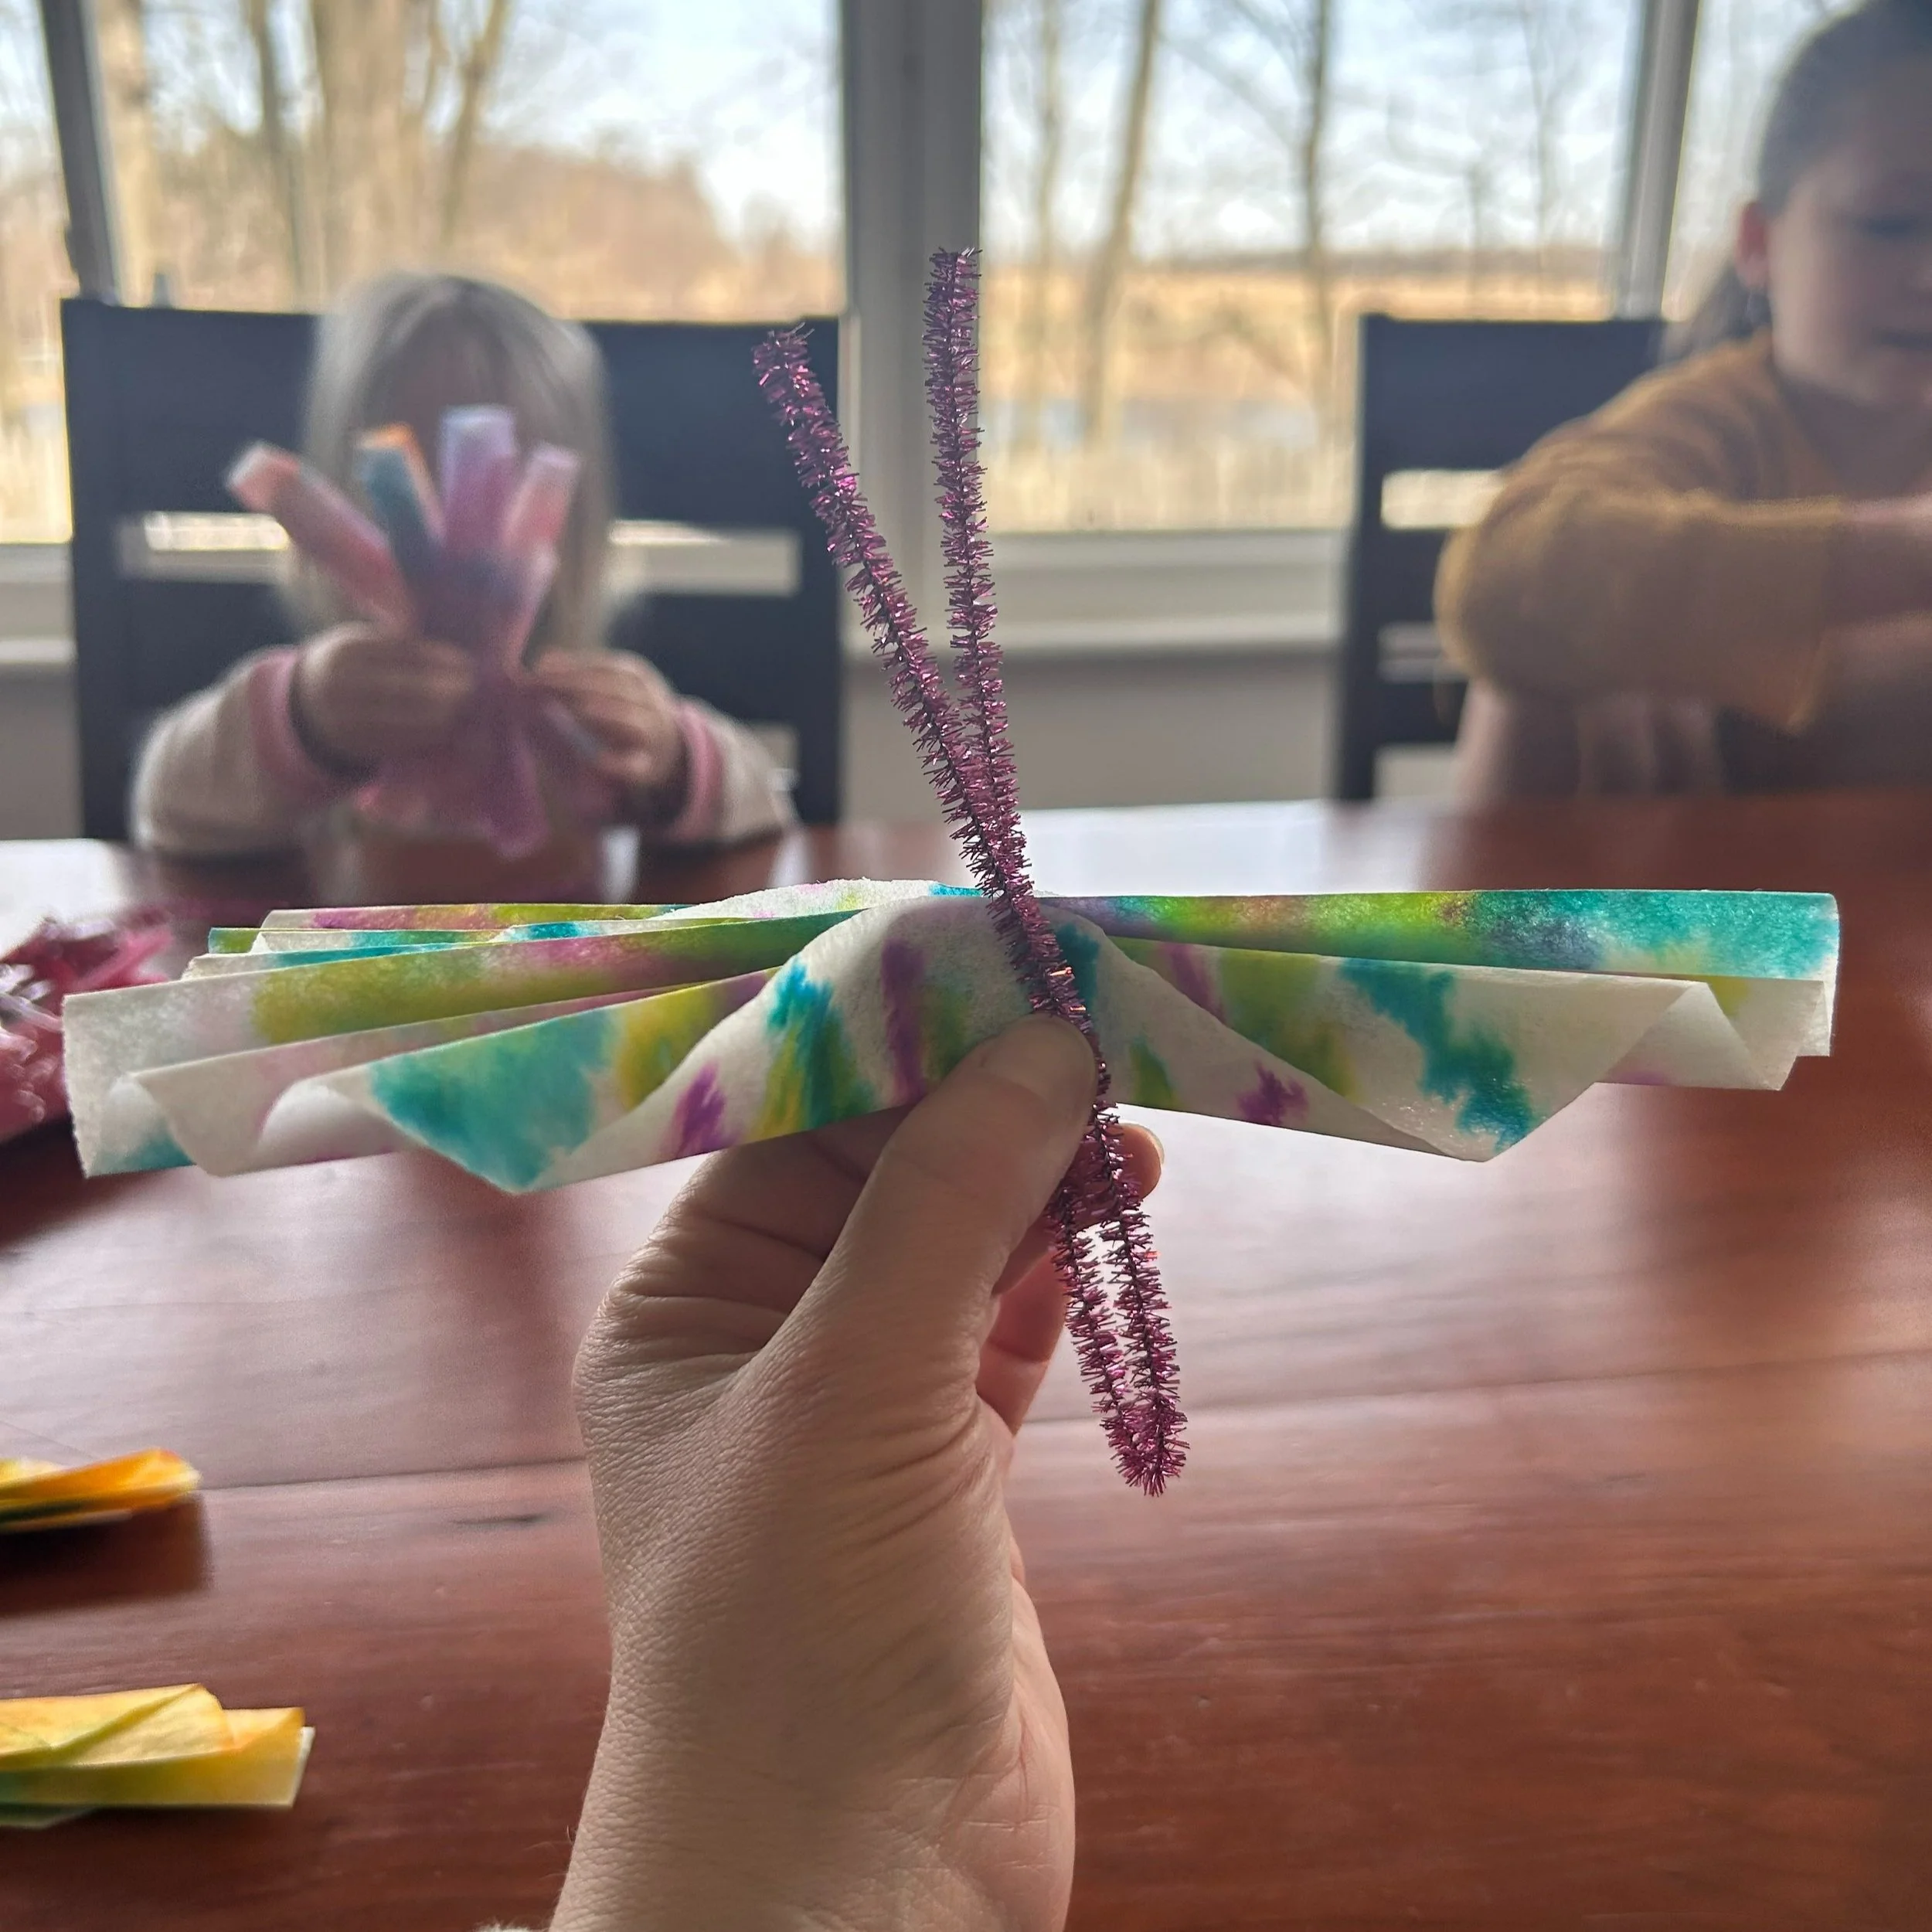
Stack two fan-folded coffee filters on top of one another and secure them in the middle with the pipe cleaner. To secure with the pipe cleaner, you’ll want to fold the pipe cleaner in half, and slide the coffee filters through the folded pipe cleaner about ⅓ of the way up. Twist the pipe cleaner just above the coffee filters and just below the coffee filters. Continue twisting the pipe cleaner all the way to the bottom, creating the butterfly’s body. Continue twisting on the top half as well, but not all the way to the tip - you’ll want to leave room for the antennae.
Open up the folded coffee filters and shape the wings of the butterfly. Curl the antennae if you wish to add a little extra flourish to your butterfly!
Tie fishing line or other string to your butterfly. Where you tie the string on the body will determine how it lays when you hang them up. Adhere the butterflies to the ceiling (or wherever you want to add some whimsy) with scotch tape or clay adhesive.
These cute little butterflies were the perfect addition to our spring decor and kept my kids entertained for a good hour (which is an eternity when you’re a mother of many kids)! For the last couple of years my kids have had a blast raising caterpillars in a butterfly net for release and this project reminded me that it was time to purchase our caterpillars. Last year we waited a bit too long to release them which led to a lot of questions about butterflies reproducing… Oh the memorable moments of motherhood.

Perfect spring decor!